How to Mask URL for Subdomain in WordPress
Masking a URL for a subdomain in WordPress can be a valuable technique for improving user experience and maintaining brand consistency. In this comprehensive guide, we will walk you through the process of masking a URL for a subdomain in WordPress. This guide is designed to be SEO-friendly, providing you with all the necessary steps and information to achieve your goal.
What is URL Masking?
URL masking allows you to display a different URL in the address bar of the browser while the actual content is served from another URL. This technique is often used to keep URLs clean and user-friendly, or to maintain a consistent brand image.
Why Mask URLs for Subdomains?
- Brand Consistency: Maintain a uniform brand image across different subdomains.
- User Experience: Simplify URLs to make them more user-friendly.
- SEO Benefits: Clean URLs can improve click-through rates and search engine rankings.
Step-by-Step Guide to Mask URL for Subdomain in WordPress
Step 1: Set Up the Subdomain
Before you can mask a URL, you need to have a subdomain set up. Here’s how you can do it:
- Log in to Your Hosting Account: Access your hosting control panel.
- Navigate to Subdomains Section: Look for the subdomains option, usually found under the domain management section.
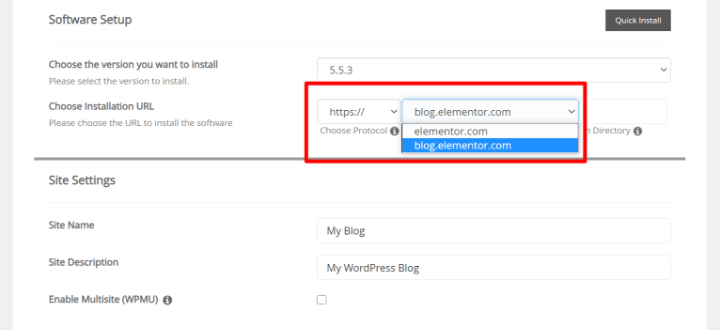
- Create a New Subdomain: Enter the name of your subdomain (e.g., blog.yourdomain.com) and specify the directory it should point to.
- Save Changes: Click on the create or save button to finalize the setup.
Step 2: Install and Activate a Plugin
To mask a URL in WordPress, you can use a plugin. One of the most popular plugins for this purpose is “Pretty Links.”
- Go to Plugins > Add New: In your WordPress dashboard, navigate to the plugins section.
- Search for Pretty Links: Type “Pretty Links” in the search bar.
- Install and Activate: Click on the install button and then activate the plugin.
Step 3: Create a Pretty Link
Once the plugin is activated, you can create a masked URL.
- Navigate to Pretty Links > Add New: In your WordPress dashboard, go to the Pretty Links section and click on “Add New.”
- Enter Target URL: In the target URL field, enter the actual URL of the subdomain you want to mask.
- Enter Pretty Link: In the Pretty Link field, enter the URL you want to display (e.g., yourdomain.com/blog).
- Set Options: Configure any additional options such as redirection type and tracking.
- Create: Click on the create button to finalize the process.
Step 4: Verify the Masked URL
After creating the masked URL, it’s important to verify that it works correctly.
- Open a New Browser Tab: Open a new tab in your browser.
- Enter the Masked URL: Type in the masked URL you created.
- Check Redirection: Ensure that the masked URL redirects to the correct subdomain and that the address bar displays the masked URL.
FAQ
Is URL masking bad for SEO?
URL masking itself is not inherently bad for SEO, but it should be used carefully. Search engines prefer transparent and straightforward URLs. Overusing URL masking can lead to confusion and potential penalties.
Can I mask URLs without a plugin?
Yes, you can mask URLs without a plugin by editing your .htaccess file. However, this method requires technical knowledge and is not recommended for beginners.
Will URL masking affect my website’s performance?
Properly implemented URL masking should not significantly affect your website’s performance. However, poorly configured redirects can slow down page load times.